Defending the Çatalca Line
Often described as the prelude to the First World War, the Balkan Wars of 1912-13 demonstrated the impact of massive armies and modern weaponry on the battlefield. However, most of the well-known battles of both wars were battles of manoeuvre, far removed from the positional warfare that would dominate the First World War, at least on the European fronts. One exception was the Turkish defence of the Çatalca lines in Thrace that defended Istanbul.
The First Balkan War arose out of the rising nationalism of the Balkan states, which the Ottoman Empire struggled to respond to. The Young Turk Revolution of 1908 had started a process of reform, including the military, but this was far from complete when Serbia, Bulgaria and Montenegro, later joined by Greece, put aside their differences to combine militarily to force the Ottomans out of the Balkans. The Ottomans were weakened by the Italo-Ottoman War of 1911 and revolts in several parts of the Empire. The Great Powers were also divided and unlikely to intervene directly.
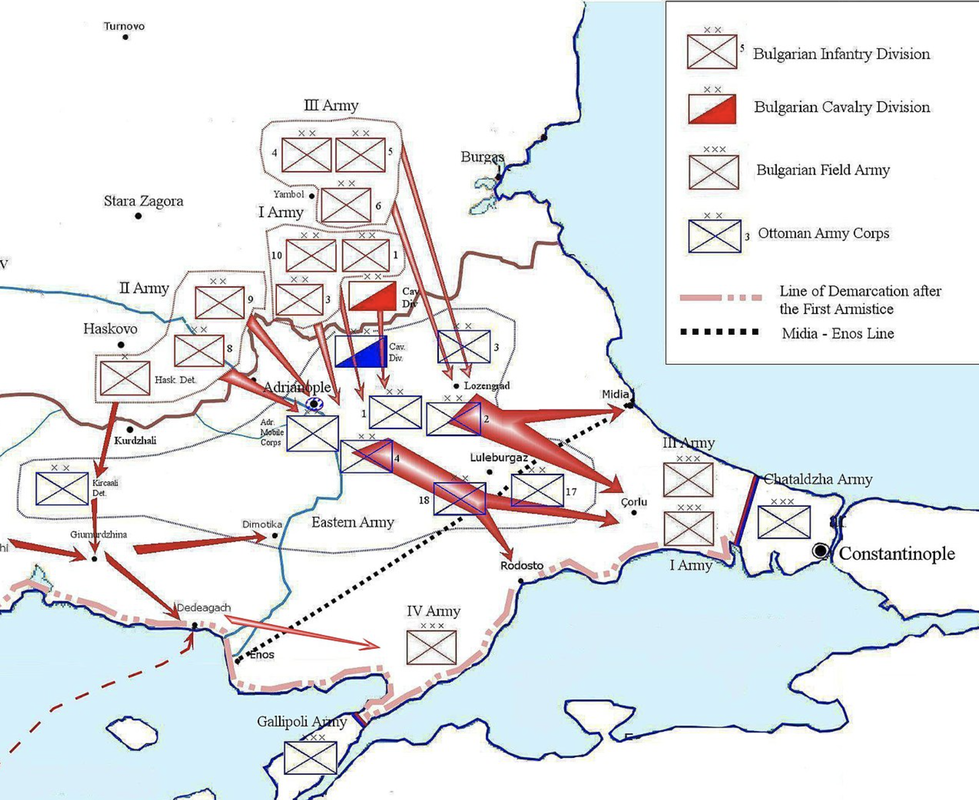
The war began on 8 October, with Montenegro attacking Ottoman positions in Albania. Serbia launched an offensive south towards Skopje in modern North Macedonia, and the Greeks attacked Thessaly and then into Macedonia towards Thessalonica. Finally, Bulgaria, with three armies, attacked Thrace on 18 October. The Bulgarian Second Army surrounded the 50,000 Ottoman garrison in the fortress city of Adrianople (Edirne), while the Bulgarian First and Third Armies swept into Eastern Thrace. These armies caught the partially mobilised Ottoman Eastern Army in an open battle around Kirkkilise, made worse by poor Ottoman intelligence and an attempted flank attack against a numerically superior force.
The retreating Eastern Army was reorganised and reinforced at the next defensive position at Lüleburgaz-Pinarhisar. The Bulgarian forces were reduced by a detachment to screen the Adrianople fortress and were slightly outnumbered by the Ottoman forces. The linked battles fought from 29 October to 2 November 1912 would be the largest battle in Europe since the Franco-Prussian War, with more than 100,000 men on each side. After fierce fighting and some 20,000 casualties on both sides, the Bulgarian 6th Division captured Lüleburgaz, and the Ottomans withdrew. Again confused Ottoman command structures contributed to the defeat, while the Bulgarian troops exhibited superior morale.
The First Balkan War arose out of the rising nationalism of the Balkan states, which the Ottoman Empire struggled to respond to. The Young Turk Revolution of 1908 had started a process of reform, including the military, but this was far from complete when Serbia, Bulgaria and Montenegro, later joined by Greece, put aside their differences to combine militarily to force the Ottomans out of the Balkans. The Ottomans were weakened by the Italo-Ottoman War of 1911 and revolts in several parts of the Empire. The Great Powers were also divided and unlikely to intervene directly.
The war began on 8 October, with Montenegro attacking Ottoman positions in Albania. Serbia launched an offensive south towards Skopje in modern North Macedonia, and the Greeks attacked Thessaly and then into Macedonia towards Thessalonica. Finally, Bulgaria, with three armies, attacked Thrace on 18 October. The Bulgarian Second Army surrounded the 50,000 Ottoman garrison in the fortress city of Adrianople (Edirne), while the Bulgarian First and Third Armies swept into Eastern Thrace. These armies caught the partially mobilised Ottoman Eastern Army in an open battle around Kirkkilise, made worse by poor Ottoman intelligence and an attempted flank attack against a numerically superior force.
The retreating Eastern Army was reorganised and reinforced at the next defensive position at Lüleburgaz-Pinarhisar. The Bulgarian forces were reduced by a detachment to screen the Adrianople fortress and were slightly outnumbered by the Ottoman forces. The linked battles fought from 29 October to 2 November 1912 would be the largest battle in Europe since the Franco-Prussian War, with more than 100,000 men on each side. After fierce fighting and some 20,000 casualties on both sides, the Bulgarian 6th Division captured Lüleburgaz, and the Ottomans withdrew. Again confused Ottoman command structures contributed to the defeat, while the Bulgarian troops exhibited superior morale.
Avidius, Attribution, via Wikimedia
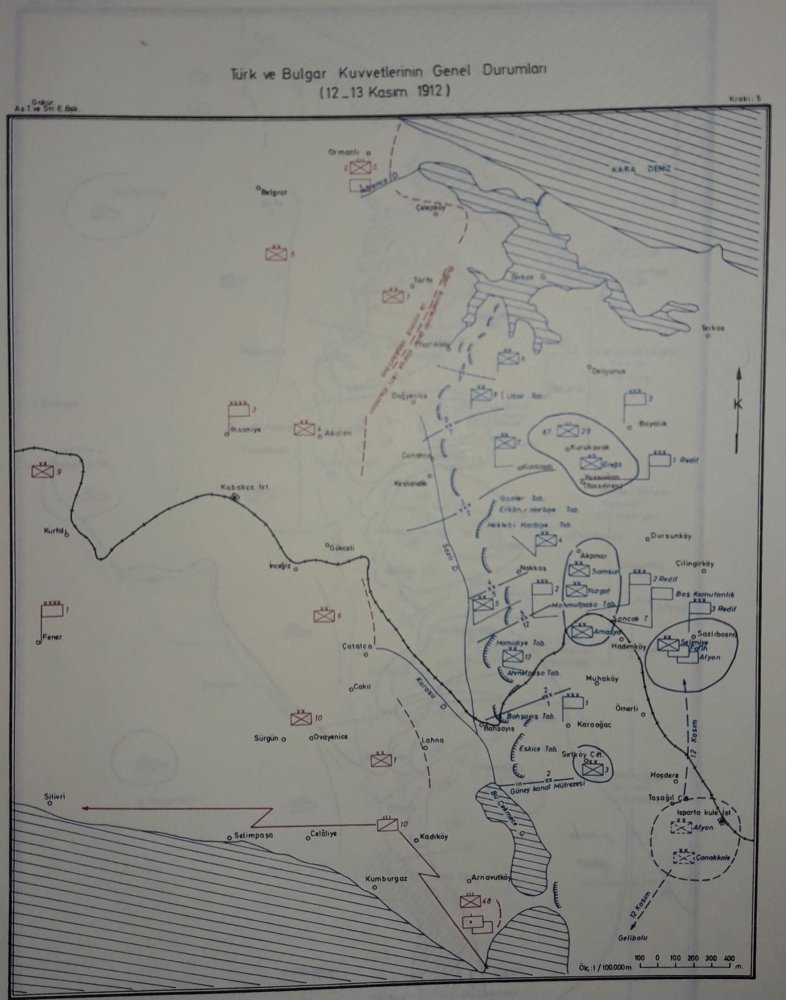
An effective rear-guard action by the Ottoman III Corps and Bulgarian exhaustion allowed the Ottoman forces to retreat to their final defensive positions at Çatalca. This is a naturally strong defensive position along a ridgeline that goes from the lake of Terkos Gölü in the north to the lake of Büyük Çekmece Gölü on the Sea of Marmara in the south. Due to these natural obstacles, the defence line centred on the village of Hadimköy is only 25km long. The Russians invested it in 1878, and since then the Ottomans had strengthened the position with advice from German staff officers. A line of ten forts had been built with telephone and underground ammunition stores. Good rail and road links went to the capital with its extensive logistical support.
The Ottoman CinC Nazim Pasha decided that all armies would have to go onto the defensive, and he took command of the new Çatalca Army. This consisted of the regular Ottoman I (Yaver Pasha), II (Hamdi Pasha) and III Corps (Muhtar Pasha), supported by three Provisional Reserve Corps built around the newly arriving reinforcements. Their task would be to counterattack any breach of the lines held by the regular corps. Belatedly, the reinforced artillery was centralised into area commands controlling some 81 batteries. The navy was mobilised to protect the flanks and troops allocated to the Gallipoli Peninsula. In the two weeks it took the Bulgarians to reach the Çatalca Line, the Ottomans had effectively reorganised their forces in a solid defensive position.
The Ottoman CinC Nazim Pasha decided that all armies would have to go onto the defensive, and he took command of the new Çatalca Army. This consisted of the regular Ottoman I (Yaver Pasha), II (Hamdi Pasha) and III Corps (Muhtar Pasha), supported by three Provisional Reserve Corps built around the newly arriving reinforcements. Their task would be to counterattack any breach of the lines held by the regular corps. Belatedly, the reinforced artillery was centralised into area commands controlling some 81 batteries. The navy was mobilised to protect the flanks and troops allocated to the Gallipoli Peninsula. In the two weeks it took the Bulgarians to reach the Çatalca Line, the Ottomans had effectively reorganised their forces in a solid defensive position.
The Bulgarians also strengthened their First and Third Armies with fresh troops. However, as the Ottomans still held Adrianople, their 130 mile supply line depended on a weak road network. There was also the first outbreak of cholera, which would eventually kill and disable more Bulgarian troops than Ottoman fire. Nevertheless, the Bulgarians amassed 118,092 rifles, 146 machine guns and 462 guns, as against the Ottomans 103,514 rifles, 62 machine guns and 316 guns. This was also the first conflict that saw extensive use of aircraft, with the Bulgarians field 20 aircraft and the Ottomans six.
General Dimitriev commanding the two Bulgarian armies, believed that a frontal attack would succeed at some point in the line and lead to a general retreat. This was based on the success of the Bulgarian bayonet assault tactics in the earlier battles. It wasn't a subtle plan, but tactical deception was difficult because the Ottomans held the high ground. On 17 November, after a preliminary bombardment, 14 Bulgarian infantry regiments attacked the lines. They were swept by rifle and machine-gun fire, and most importantly, the centralised Ottoman artillery established fire superiority. The Bulgarians were first pinned and then forced to retreat to their starting lines. There was one localised success with a night attack on the Ileri Fort, but a counterattack recaptured it, albeit with the loss of probably the best Ottoman general, Muhtar Pasha.
Dimitriev surprisingly repeated the attack the following day with the same troops and with the same outcome. Finally, with more than 12,000 casualties, the Bulgarian High Command called off the attack and went over to the defensive. The First Çatalca battle demonstrated that the Ottomans had learned the hard lessons of modern warfare, while the Bulgarians failed to use their reserves to exploit local success. Moreover, both sides now suffered from the cholera outbreak, although the Ottomans still benefited from shorter supply lines. No doubt, much to the soldiers' relief, an armistice was agreed on 3 December. A similar armistice was agreed at Adrianople on 9 December. The Serbian Army, fresh from its victories in Macedonia, had sent reinforcements and heavy artillery to Adrianople, releasing Bulgarian units to the Çatalca lines. Another armistice was agreed at Gallipoli on 22 December.
Plan of the Catalca lines in 1912
The armistice held until 3 February, when the peace deal worked out at the London conference was rejected by the Ottomans following a Young Turk coup d’état. This allowed all armies to regroup over the worst weather period in the Balkans. This was particularly valuable for the reinvigorated Ottoman army at Çatalca, which had a new commander, Major General Ahmet Abuk Pasha, following the assassination of Nazim Pasha in January.
He made no change to the Ottoman order of battle, although a new Provisional X Corps was created from units arriving from Caucasia and Yemen. The plan was to land this corps at Sarkoy on the Sea of Marmara and then envelop the Bulgarian Fourth Army in front of Gallipoli. The other corps would launch pinning attacks.
The Provisional Corps at Gallipoli attacked on 8 February near the Turkish village of Bolayir. While they had a numerical superiority at the point of attack, the Bulgarians had concentrated more artillery. As a result, the Turkish troops suffered heavy casualties before the attack ground to a halt. Meanwhile, after several delays, X Corps (two infantry divisions with cavalry and artillery support) forces embarked on ships and, with naval gunfire support, started to land, largely unopposed near Sarkoy. However, an attack on the village with its piers failed to dislodge the Bulgarian covering force. The Bulgarians reinforced the village overnight, but the much stronger Ottoman troops broke into the village by noon. The Bulgarians retreated northwards, destroying the piers.
The Bulgarian Fourth Army moved to respond to the Ottoman landings, boosted by the failure of the Bolayir attacks. The Ottomans still had naval gunfire support, but their heavy artillery had yet to land. The Ottoman High Command believed that the Bulgarians had more than 50,000 troops poised to attack the landings and ordered an evacuation. An impressive plan was devised by Staff Lieutenant Colonel Enver, who collapsed the defences in stages down to a short interior defensive line. The final units embarked at night under the naval guns. Amphibious operations are notoriously tricky to pull off, and given the need for secrecy, very little training was undertaken. In these circumstances, the landings were quite an achievement and only failed because of the failed pinning attacks and the strength of the Bulgarian Fourth Army. Even then, the withdrawal was brilliantly executed.
The pinning attacks from the Çatalca Lines were supported by a small landing force behind the Bulgarian lines. The attack successfully turned the flank of the Bulgarian 10th Division and advanced some six kilometres. A general advance was ordered on 9 February, which overran the Bulgarian trenches and moved several kilometres. Cholera weakened Bulgarian forces had decided to pull back to higher ground some 20 kilometres back. A tactical defeat with heavy losses, but the battle didn't change the strategic situation.
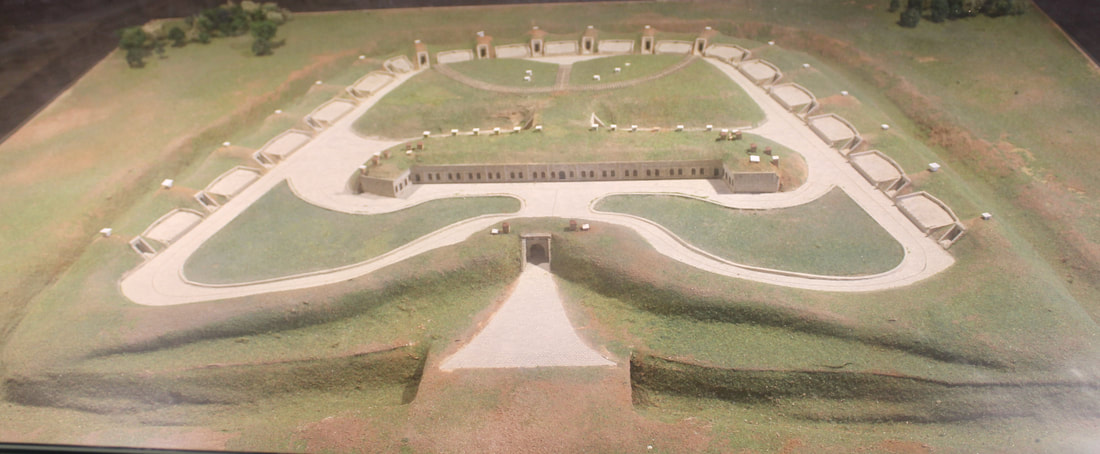
A model of an Adrianople bastion (Author: Balkan Wars Museum, Edirne)
|
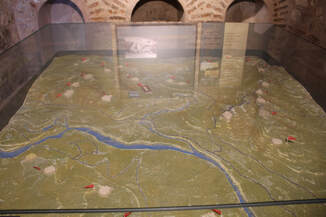
Relief model of the defences of Adrianople (Author, Balkan Wars Museum, Edirne)
|
The fortress city of Adrianople was still besieged and running short of food. On 18 December, typhoid and cholera had broken out in the city, and medicine was also running short. On the resumption of hostilities, the Bulgarians shelled civilian areas of the town, starting fires that left many homeless. This shelling intensified with the addition of seventeen Serbian heavy artillery batteries. Sorties from the garrison on Bulgarian artillery positions failed with heavy losses. Bulgarian and Serbian divisions launched a series of attacks on 24 March, penetrating a weak point in the Ottoman defences. The garrison commander surrendered the city on 26 March.
While the battle raged at Adrianople, the First and Third Bulgarian armies attacked the Çatalca Army, which was now somewhat exposed in front of their fortifications. The Ottoman forces were pushed back but held the important Büyük Çekmece bridgehead, which being forward of the lake was an important base for any future offensive operations. Bulgarian attacks were beaten back, as were Ottoman offensive operations supported by naval gunfire. The Second Battle of Çatalca ground to a halt with few gains on either side. The Bulgarians had pushed the Turks back to the valley in front of the Çatalca Lines, but the Turks had expanded their bridgehead along the Sea of Marmara.
The Treaty of London ended the First Balkan war on 30 May 1913 based on the status quo at the time of the armistice. However, the victorious Balkan states fell out, mainly over the division of Macedonia. With Bulgarian forces committed in Macedonia, the ottomans advanced from their positions and retook Adrianople. The subsequent treaties returned Adrianople and western Thrace to the Turks. Finally, the Treaty of Constantinople (30 September 1913) formalised the border that remains in place today.
Further reading:
The must-read book on the Ottoman Army in the Balkans 1912-13 is Edward Erickson’s Defeat in Detail(Praeger, 2003). For a general history of the wars, Richard Hall's The Balkan Wars, 1912-1913 (Routledge, 2000). For wargamers looking for uniform details, there is Osprey MAA 466, Armies of the Balkan Wars 1912-13 by Philip Jowett, and The Balkan War 1912-1913 by Alexander Vachov (Sofia, 2005).
Any WW1 set of wargame rules will work for these battles. However, my preference in 15mm is for Bloody Big Battles, which is supported by an excellent supplement, Bloody Big Balkan Battles, by Konstantinos Travlos. This supplement has a specific scenario for Çatalca. For smaller actions in 28mm, I use Bolt Action.
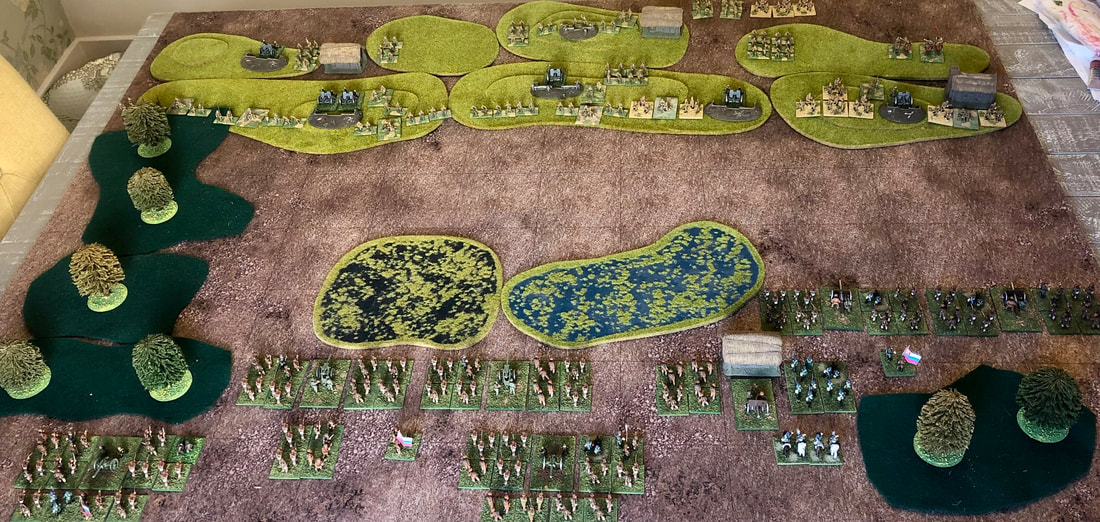
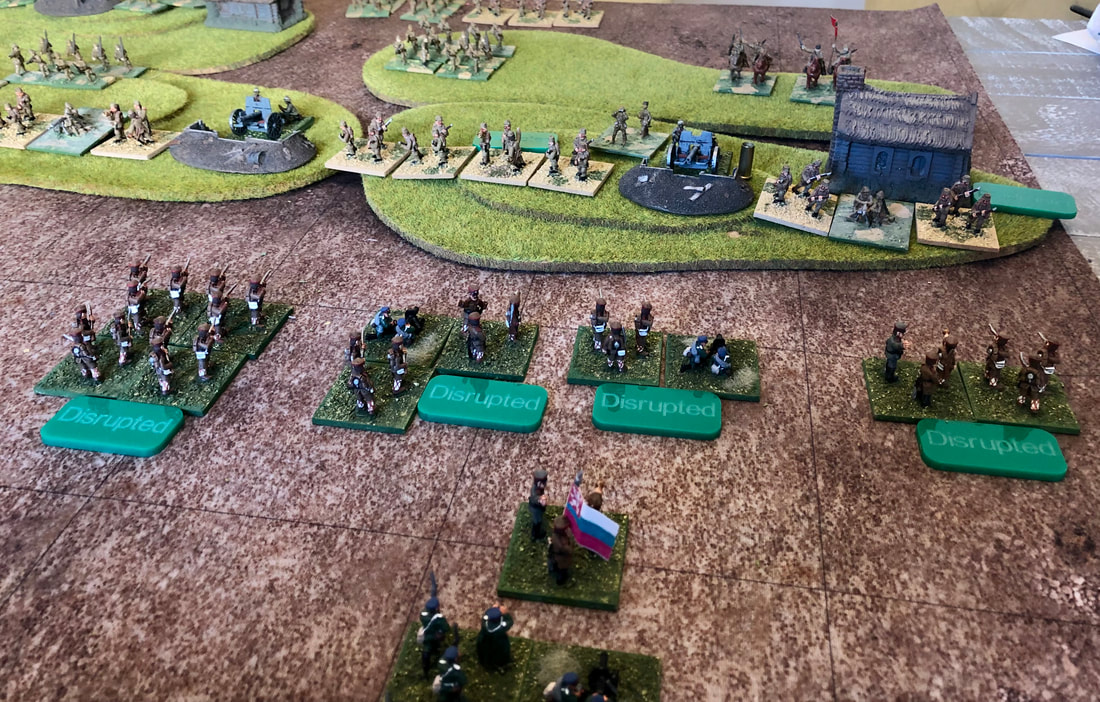
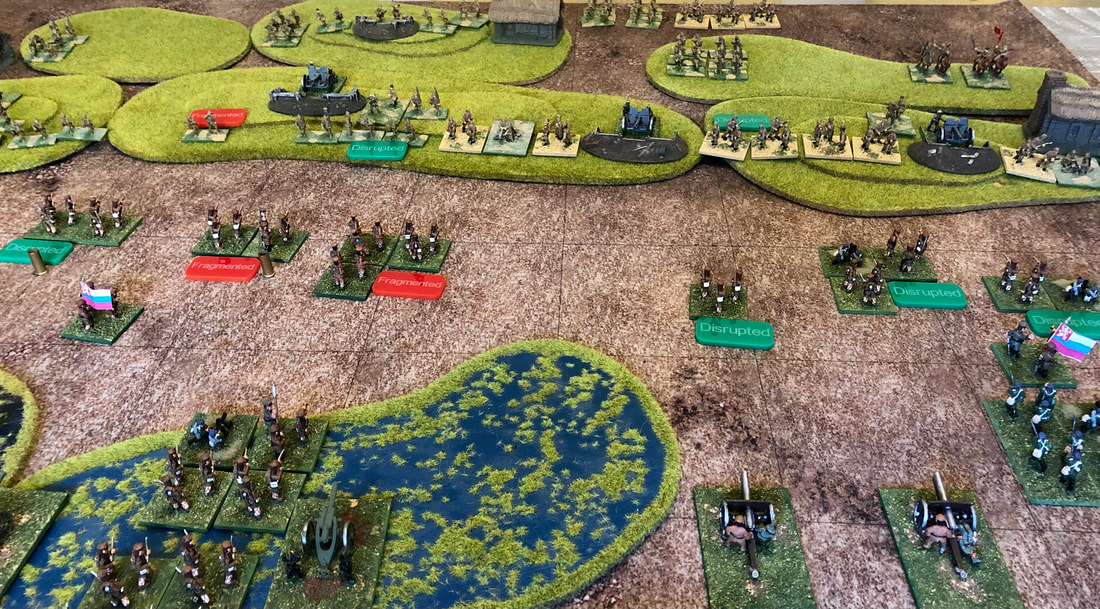
The Editor's 15mm refight went almost exactly as it did in history.
|
|
|
The Battlefield Today
The ridgeline that forms the basis for the Çatalca Lines is still obvious today, and while a motorway goes through the middle, it is otherwise underdeveloped. The ridgeline that the Bulgarians retreated to has a little more development, but from a ground eye view it is a more formidable obstacle than the Çatalca position, although longer and flankable. More than a century on, the earthworks that constituted the Çatalca Lines have largely disappeared. Some can be discerned from Google Earth (Mahmudiye Fort, south of Hakkas), but you would need an off-road vehicle to get close, and there is little to see. There is a memorial at Alaiye Sehitligi, near the village of Dag Yenice. There is an excellent new museum of the Balkan Wars at Edirne, in a renovated bastion to the northwest of the modern city. The Istanbul Military Museum also has exhibits covering the conflict, as does the Naval Museum. |
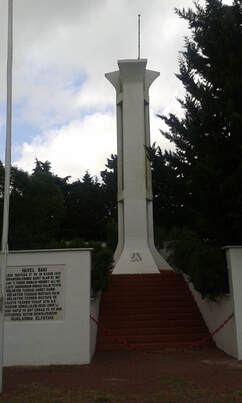
Alaiye Şehitliği (Konstantinos Travlos)
|
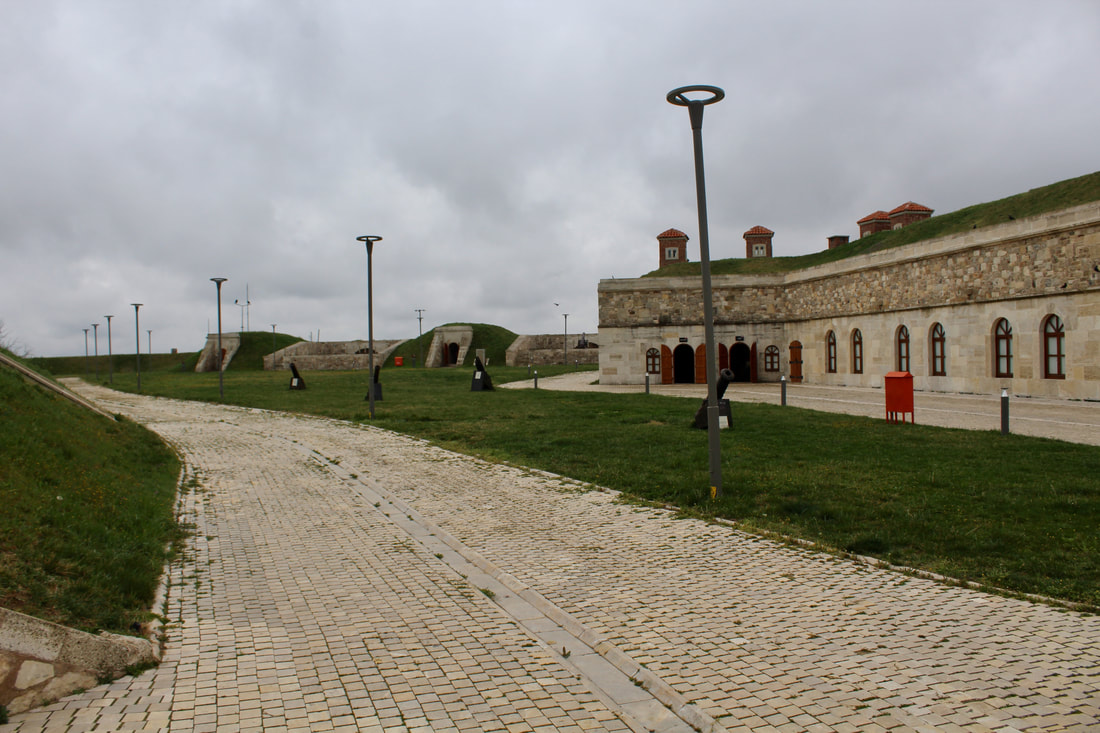
Balkan Wars Museum, Edirne (Author)
|
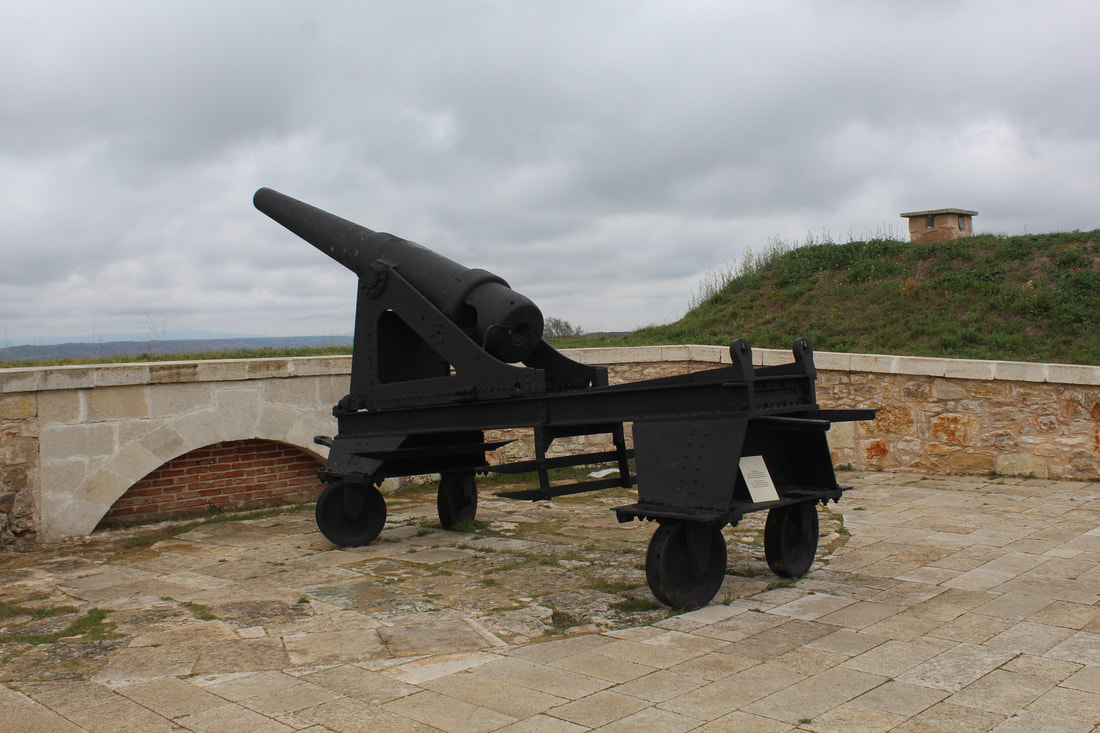
Balkan Wars Museum, Edirne (Author)
|
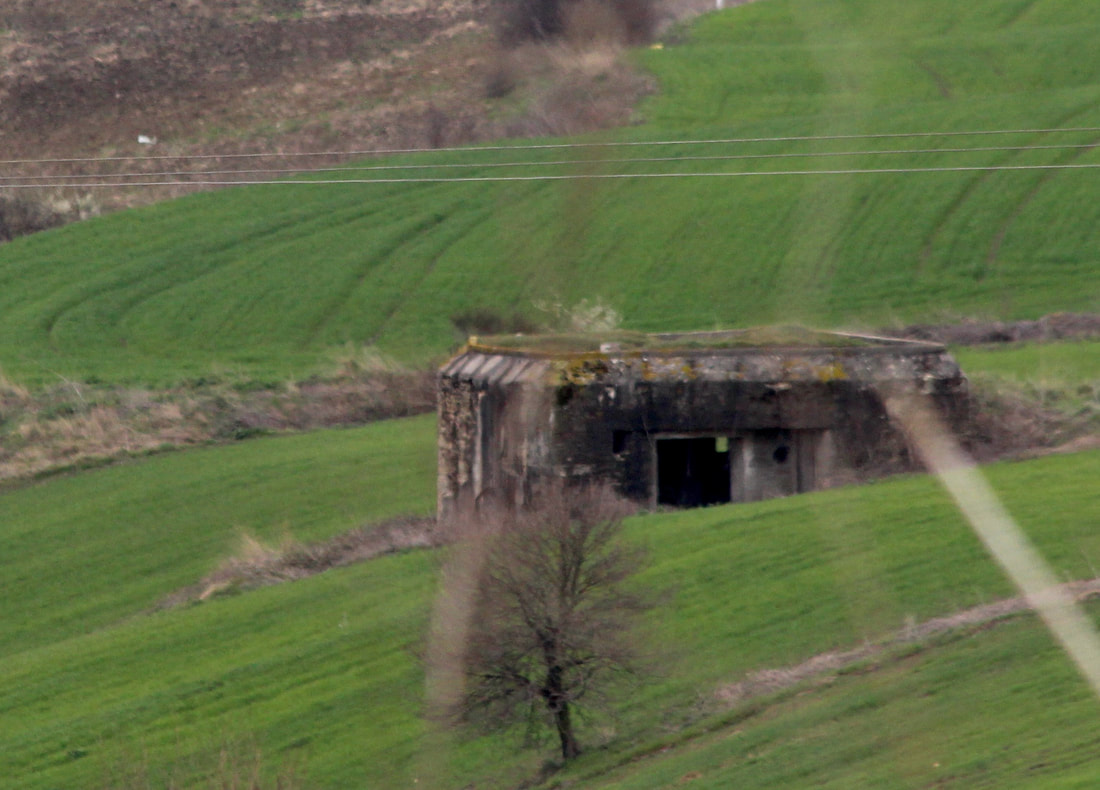
The Çatalca Lines were modernised just before WW2 by the Turkish Armed Forces, Chief of the General Staff, Fevzi Çakmak. And named the Çakmak Lines after him. Partly based on a visit to the Maginot Lines, he built a huge number of concrete bunkers on the lines, creating a defence in depth. Many of these bunkers can be seen today.
|
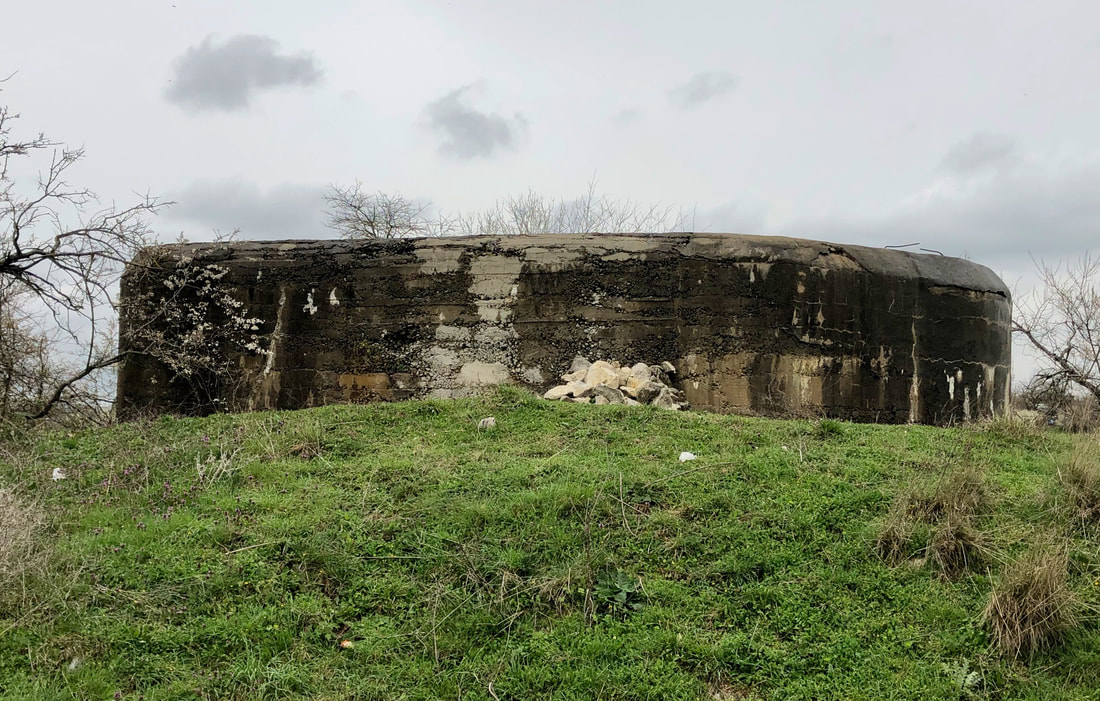
|
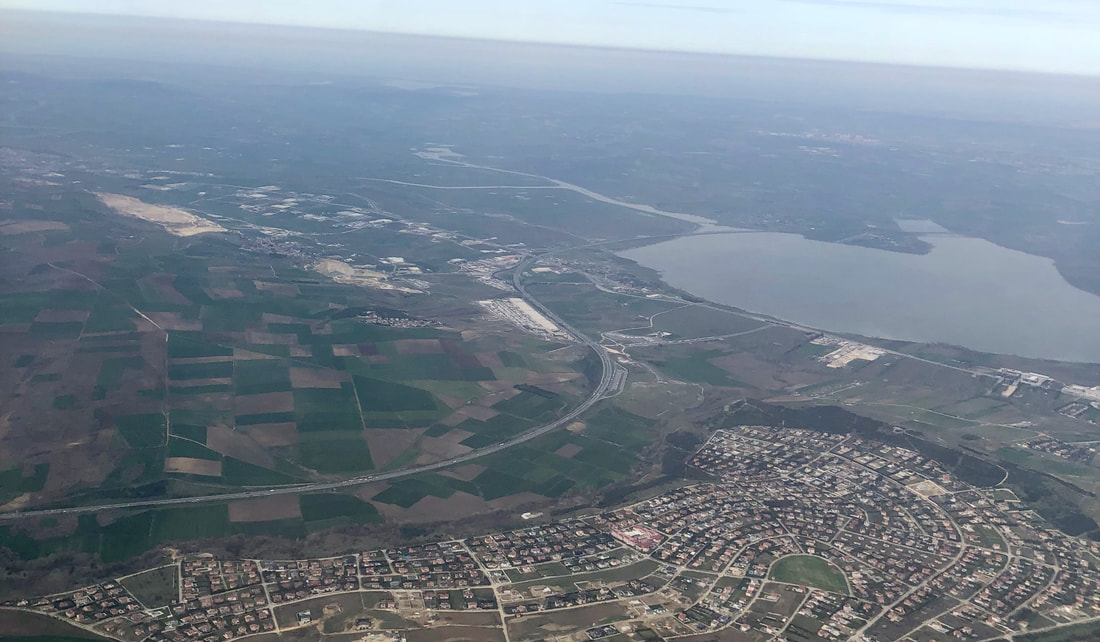
The southern end of the Çatalca Lines with the natural lake defences can be seen from this arial view (Author)
Postscript
There is some additional interest, for British readers at least, in that British troops once define the Lines. And by none other than the future Field Marshall Alexander of WW2 fame. In April 1922, his battalion of the Irish Guards was sent to Istanbul as part of the Allie occupying forces. These included three British, six French and one Italian battalion, plus air and naval units.
In August 1922, the Greco-Turkish War was starting to go badly for the Greeks in Anatolia. King Constantine of Greece announced that 'the only way to restore peace was to occupy Constantinople by Greek forces.' He then moved two divisions from Anatolia to join the four Greek divisions in Thrace. The Allied commander in Istanbul, General Harrington, responded by saying that any such attack would be resisted. He then moved part of the garrison to the Çatalca Lines, including the Irish Guards. It was only for two weeks, and Alexander wrote, 'it has been a boon, for it gave the men something else to think and talk about'.
In practice, the Çatalca Lines were in disrepair, and the Guards occupied trenches they dug themselves. Six Greek divisions could have overpowered the defenders, but the King thought better of bringing three major powers into the war against him.